Hello friends, welcome to my new tutorial, and in this tutorial, we will learn How to install MySQL Workbench on Windows, Mac and Ubuntu operating system properly using simple and easy steps.
Most of the time, whenever we try to install MySQL Workbench, We face a lot of problems and failures in the process of installing it correctly.
But with the help of this tutorial, you will be able to install MySQL Workbench on your system correctly. All you need to do is follow this guide step by step. Before starting the tutorial, Let us first have a brief description of MySQL and MySQL Workbench.
Read Also – How to Install MySQL Step by Step
Contents
- 1 What is MySQL?
- 2 What is MySQL Workbench?
- 3 System Requirements
- 4 Installing MySQL Workbench on Windows
- 5 Starting/Launching MySQL Workbench after installation on Windows
- 6 Uninstalling MySQL Workbench on Windows
- 7 Installing MySQL Workbench on Mac Operating System
- 8 Starting/Launching MySQL Workbench after installation on Mac Operating System
- 9 Uninstalling MySQL Workbench on Mac Operating System
- 10 Installing MySQL Workbench on Ubuntu
- 11 Starting/Launching MySQL Workbench after installation on Ubuntu
- 12 Uninstalling MySQL Workbench on Ubuntu Operating System
What is MySQL?
- MySQL is powered by the oracle corporation, and it is an open-source relational database management system (RDBMS) that works on many platforms.
- It uses a client/server model, which means the database typically runs on a server.
- It provides multi-user access to support many storage engines and not only these, but it also offers various other features like it provides good connectivity so you can connect with multiple databases and clients.
- MySQL uses Structured Query Language(SQL) to define, update, and query the database.
- It provides a low total cost of ownership and It is very flexible and scalable.
- It provides various other tools such as MySQL workbench.
- It is very robust and secure.
What is MySQL Workbench?
- MySQL Workbench is nothing but a visual or Graphical tool/IDE by which you can work with MySQL servers/databases and perform database connectivity.
- It is a dashboard that enables you to prepare models, perform server administration, monitor and configure your data and also perform data migration.
- It allows you to connect with the MySQL database. It makes working on the databases a lot easier because it has all the tools included to be able to build databases, tables and also administrate the database itself, for example, you can add users manage their rights.
- It allows you to do queries and other things.
- MySQL Workbench is available for all major operating systems like Windows, Linux, and Mac Os X.
Before downloading and installing MySQL Workbench, we need to know what the system requirements are for installing it correctly.
So let’s first know what the system requirements are.
System Requirements
Hardware Requirements
The minimum hardware requirements for the installation of MySQL Workbench are given below
Minimum Hardware Requirements
| CPU | Intel Cor or Xeon 3GHz ( or Dual Core 2GHz) or equal AMD CPU |
| RAM | 4 GB (6 GB recommended) |
| DISPLAY | 1024 x 768 is minimum, (1920 x 1200 or higher Recommended) |
| CORES | Single (Dual or Quad Core is Recommended) |
Software Requirements
The software requirements are
Software Requirements
| OPERATING SYSTEM | Windows 7 or higher versions, MAC OS X 10.6.1+, Ubuntu 9.10(64 bit), Ubuntu 8.04(32bit/64bit) |
| GENERAL | Microsoft .NET Framework 4.5, Microsoft Visual C++ 2015 Redistributable Package |
Installing MySQL Workbench on Windows
You have already seen what MySQL and MySQL Workbench is and what are the system requirements for the installation of MySQL Workbench.
Now Let’s learn how to install MySQL Workbench on the Windows Operating System.
Step #1
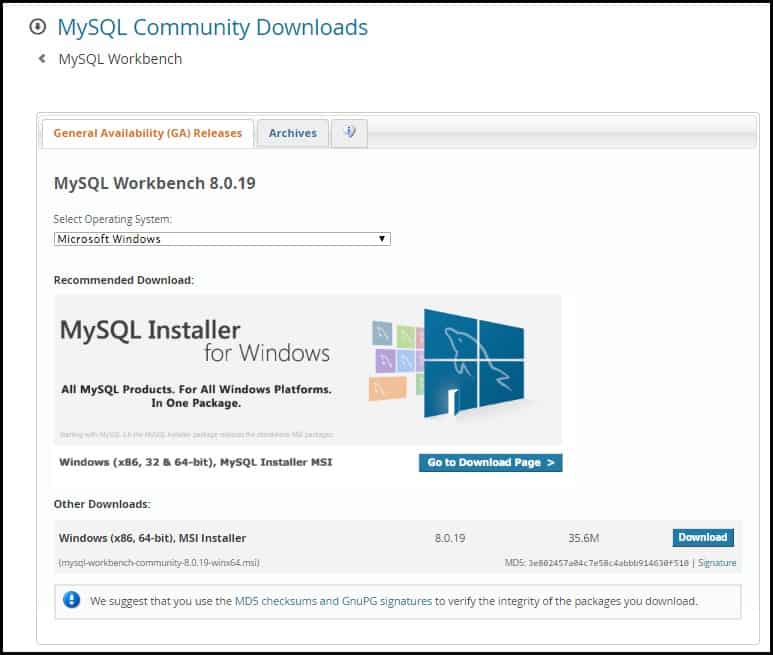
- To download MySQL Workbench on your Windows operating system, go to this link https://dev.mysql.com/downloads/workbench/
- You will be redirected to the following page.
While reading this guide, It may happen that the latest version of MySQL Workbench can be something else. But you don’t have to worry about that. Just download the latest version of MySQL Workbench and follow the same guide.
- In order to install MySQL Workbench, We need first to download and install some prerequisites in your system.
- Click on the button, as shown in the figure below, and you will be able to see what are the prerequisites that are necessary to download and install in your system.
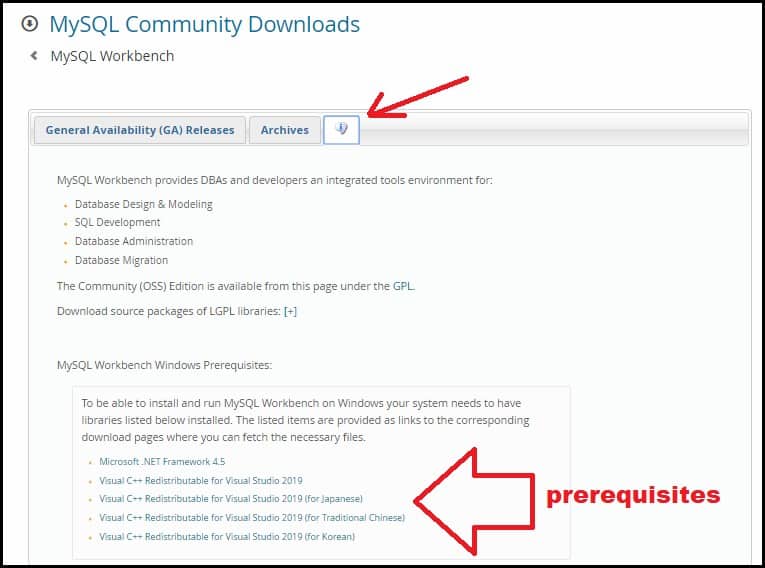
- The prerequisites for the windows operating systems are
- Just click on the given links and download and install them according to your operating system architecture (32bit/64bit).
Step #2
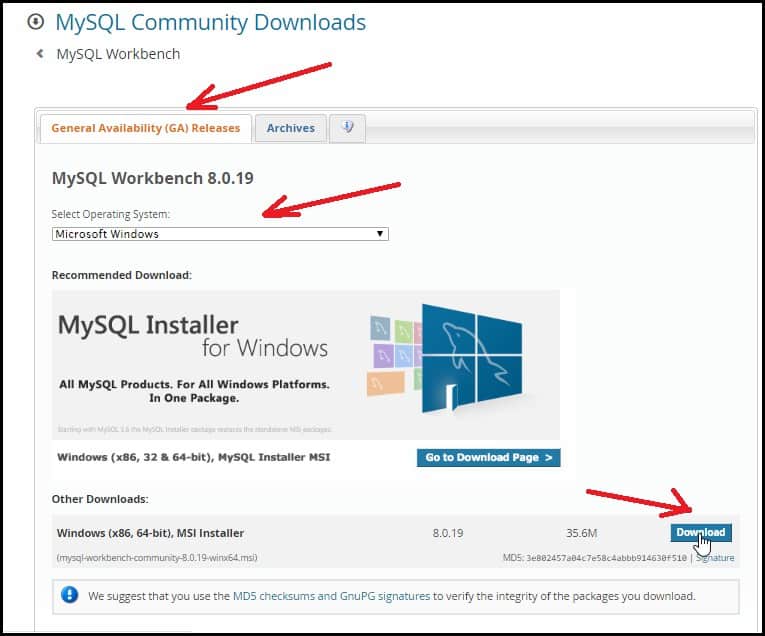
- After you have downloaded and installed the prerequisites successfully, Now click on the General Availability (GA) Releases button and then select your operating system ( Most of the time, it automatically detects your operating system ).
- Next, you need to click on the download link to download the MSI installer file as shown in the below figure.
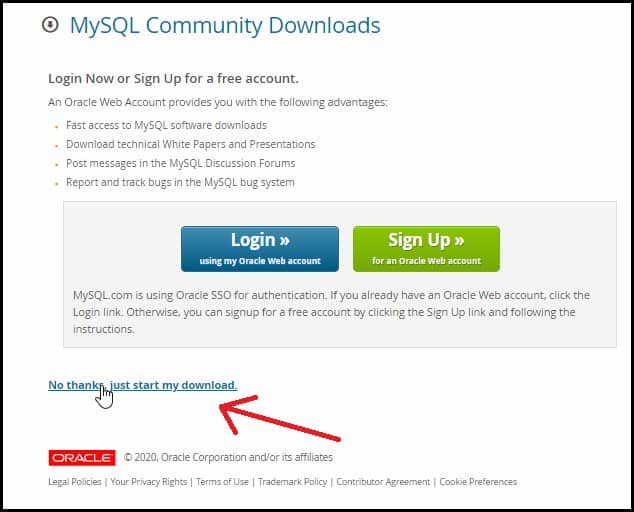
- As soon as you click on the download link, a new page will open, and It will ask you to login or sign up on Oracle web account But If you are only concerned about downloading the MySQL Workbench then scroll down a little bit and click on the link “No thanks, just start my download“ as shown in the figure below.
Step #3
- After you have successfully downloaded the MySQL installer MSI file in your system, Now you need to install it in your system.
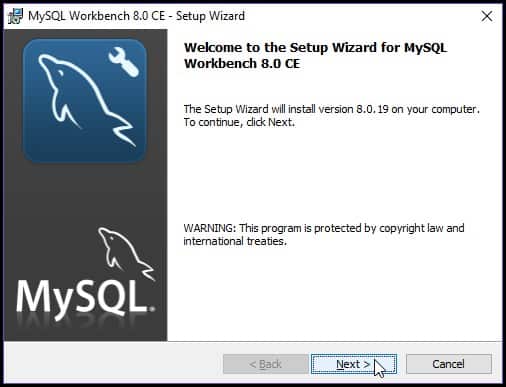
- Double click on the installer file, and you will see that the setup wizard of MySQL Workbench will open.
- Click the Next button to proceed.
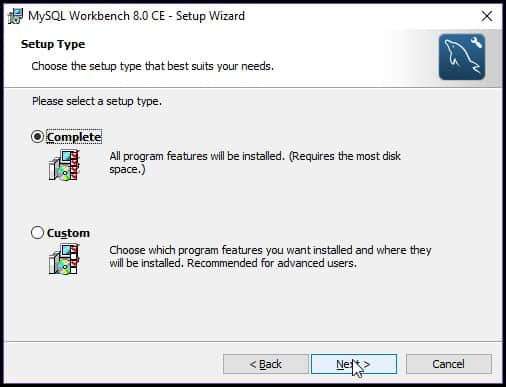
- In the next step, it will ask you about the setup type where you can choose one of two options Complete or Custom.
- In the complete option, It will install all the features of the program, and if you choose the custom option, then you can make some changes.
- Select one option and then click on the Next button.
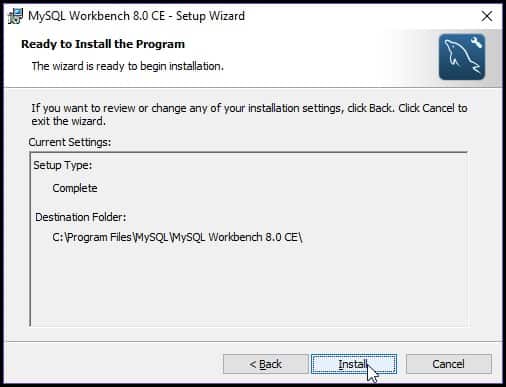
- Next, click on the Install button.
- By default, MySQL Workbench is installed in the directory C:\%PROGRAMFILES%\MySQL\MySQL Workbench 8.0 edition_type\ Where %Program Files% is the default folder where all your programs are installed.
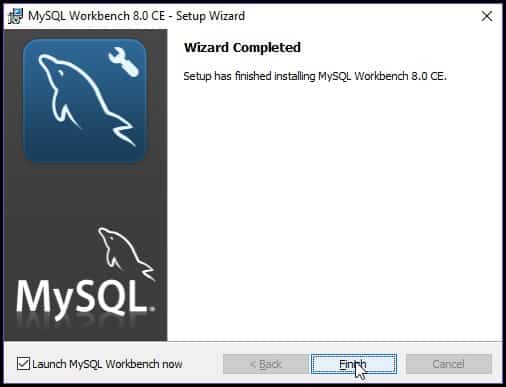
- After that, it can take a few minutes to install the program and then click on the Finish button to complete the installation process.
Starting/Launching MySQL Workbench after installation on Windows
- To start MySQL Workbench in windows go to Start>>All programs>>MySQL>>MySQL Workbench.
- You can also create a desktop shortcut or pin it to the taskbar for instant access to the program.
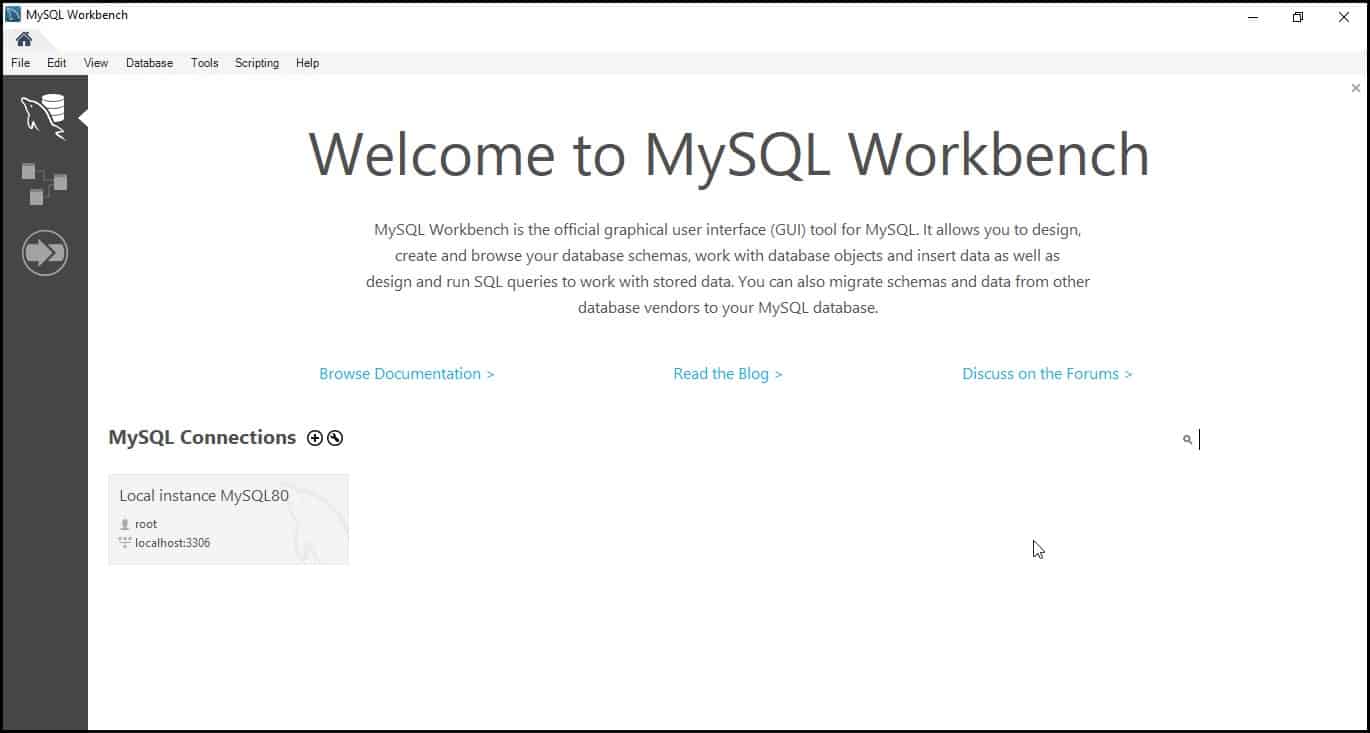
- After starting MySQL Workbench, you will see such a user interface, as shown in the below figure.
Connecting MySQL Workbench with the MySQL Server on Windows
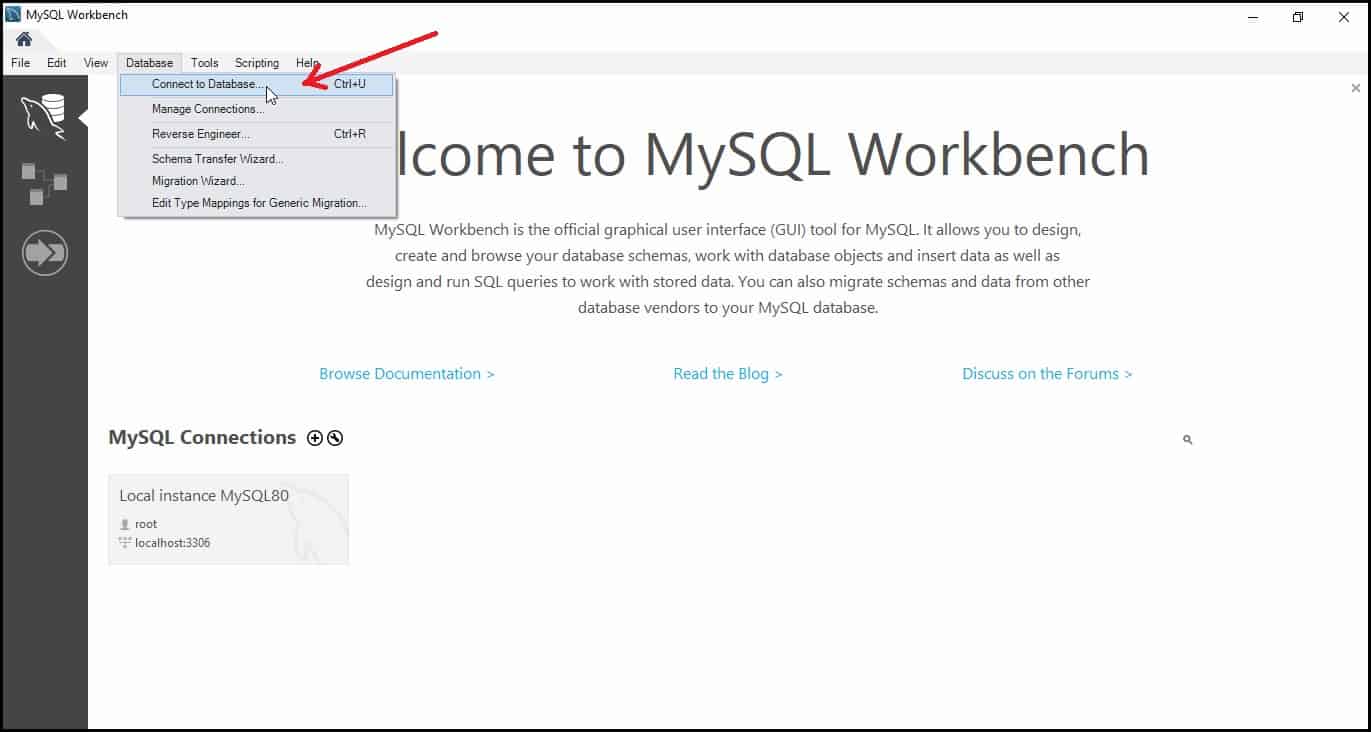
- To connect MySQL Workbench with the MySQL server, Go to the Database menu and click on Connect to Database as shown in the below figure.
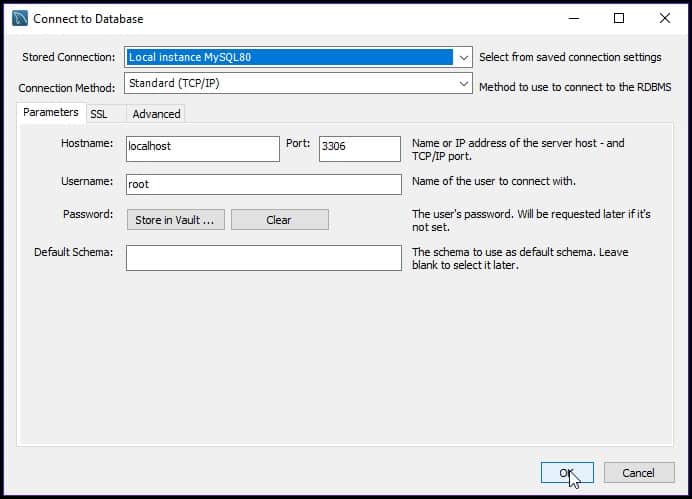
- A new pop window will be opened. You just need to click on the Ok button.
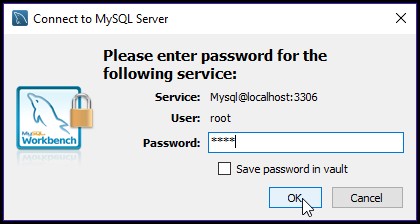
- In the next step, it will ask you to fill the password.
- This is the same password you provided during the installation process of MySQL Server. Fill the correct password and click on the Ok button.
Uninstalling MySQL Workbench on Windows
- To Uninstall MySQL Workbench on the Windows Operating system, Go to the control panel>>programs and features and then select MySQL Workbench.
- Next right click on the MySQL Workbench entry, and you will find an option “uninstall” click on that, and MySQL Workbench will be removed from the system.
Installing MySQL Workbench on Mac Operating System
As we have learned how to install MySQL Workbench on Windows Operating System, and Now we will see how to install it on Mac Operating System.
Step #1
- To download MySQL Workbench on Mac Operating system, Go to this link https://dev.mysql.com/downloads/workbench/
- You will be redirected to the following page.
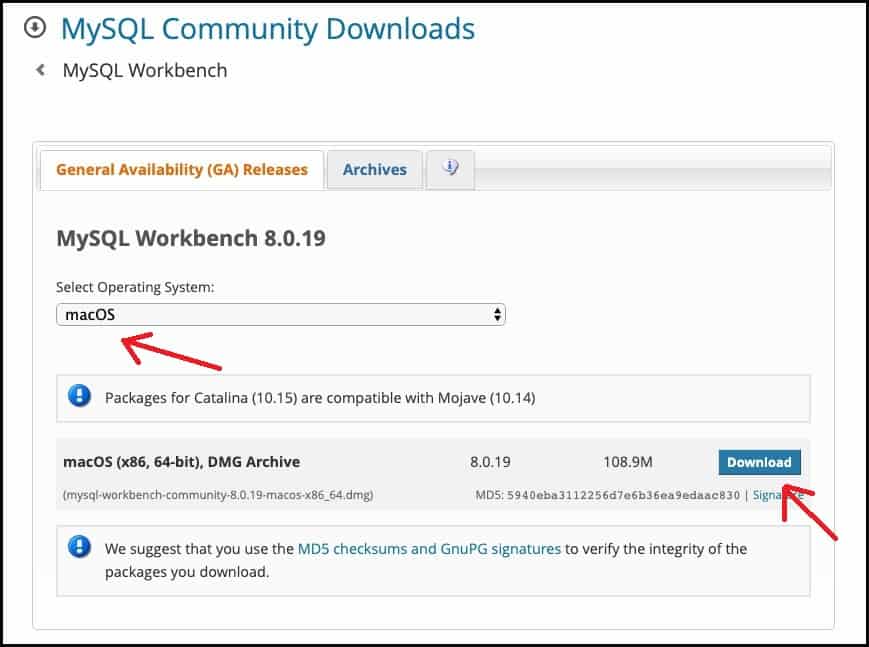
- Select the operating system as macOS and then click on the Download link to download the DMG archive file.
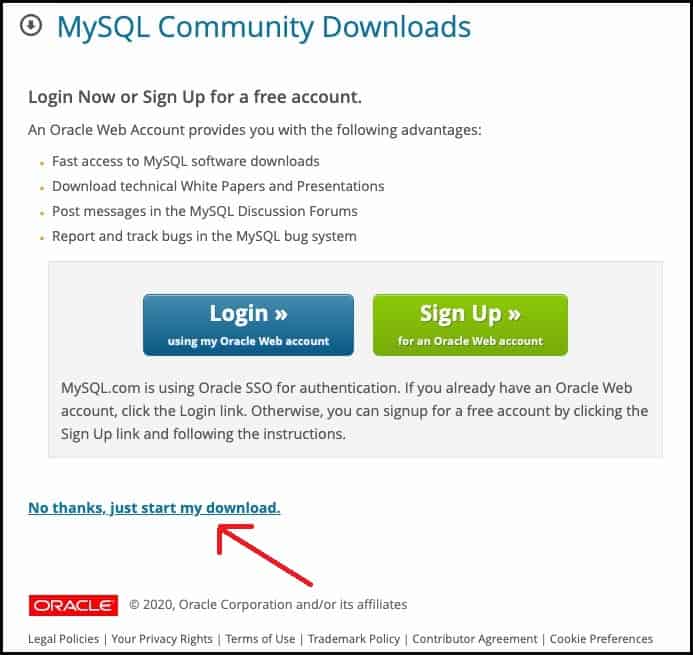
- As soon as you click on the download link, you will be redirected to another webpage, and it will ask you to Login or Sign Up to the oracle web account.
- But if you are only concerned about downloading the file, then click on the link “No thanks, just start my download” as shown in the below figure.
Step #2
- After you have successfully downloaded the file, Now the next step is that you have to install it in your system.
- Go to the location where you have downloaded the file and then open it, This will take some time, and then a dialog box will appear, and it will ask you to drag the MySQL Workbench icon to the Application folder.
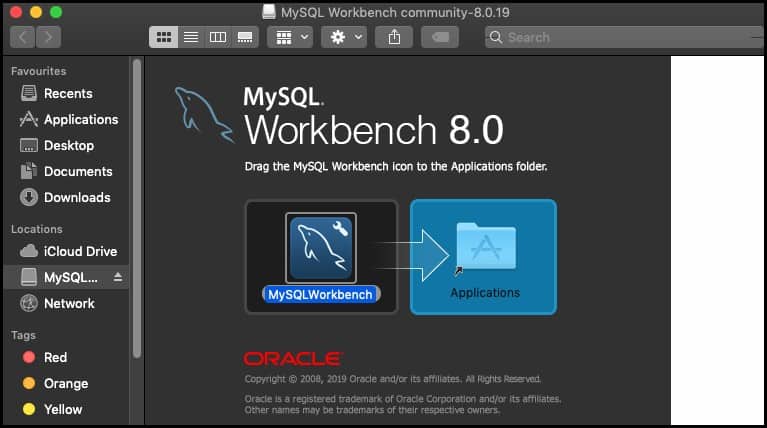
- Wait for a while until MySQL Workbench is copied to the Applications, and MySQL Workbench will be successfully installed in your system.
Starting/Launching MySQL Workbench after installation on Mac Operating System
- To start MySQL Workbench, go to Finder>>Applications and then double click on the MySQL Workbench icon to open it.
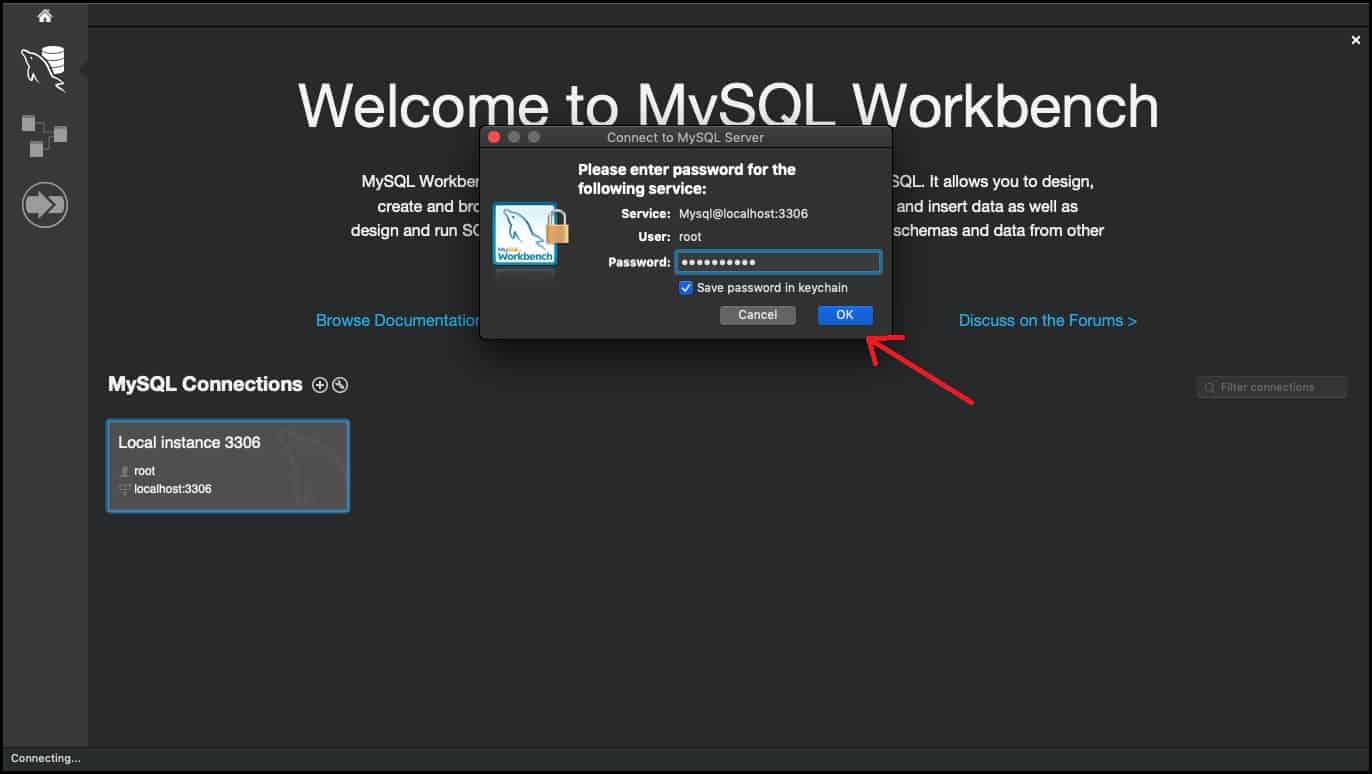
- On opening for the first time, you will see something like this user interface, as shown in the figure below.
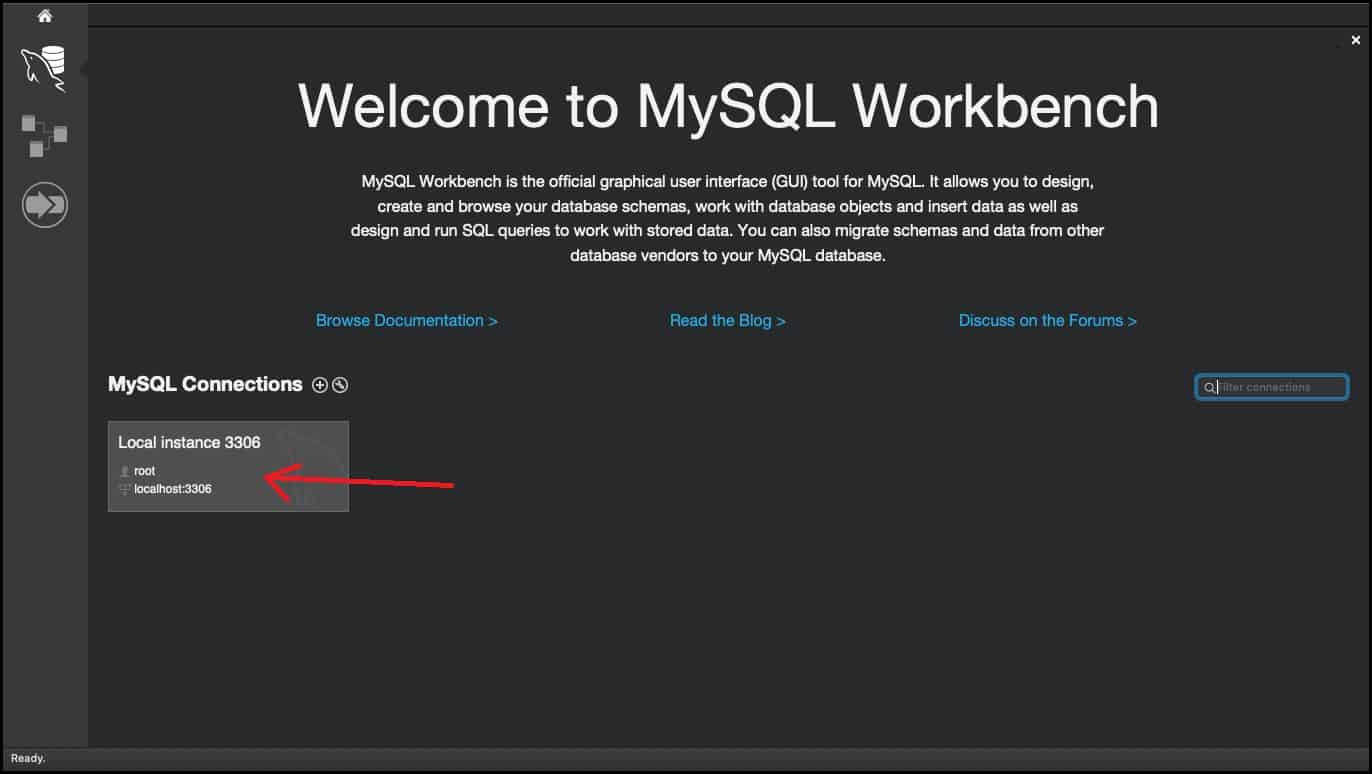
- To connect MySQL Workbench with MySQL Server, click on the location highlighted with the red arrow, as shown in the above figure.
- As soon as you click on it, a dialog box will appear, and it will ask you to fill the password.
- This is the same password that you have given during the installation process of MySQL Server, so fill in the correct password and click on the OK button.
Uninstalling MySQL Workbench on Mac Operating System
- To Uninstall MySQL Workbench on the Windows Operating system, Go to the Finder>>Applications and then select MySQL Workbench icon.
- Next right click on the MySQL Workbench icon, and you will find an option “Move to Trash” click on that, and MySQL Workbench will be removed from the system.
Installing MySQL Workbench on Ubuntu
As we have learned how to install MySQL Workbench on Windows and Mac Operating system, Now we will see How to install it on Ubuntu Operating system.
Step #1
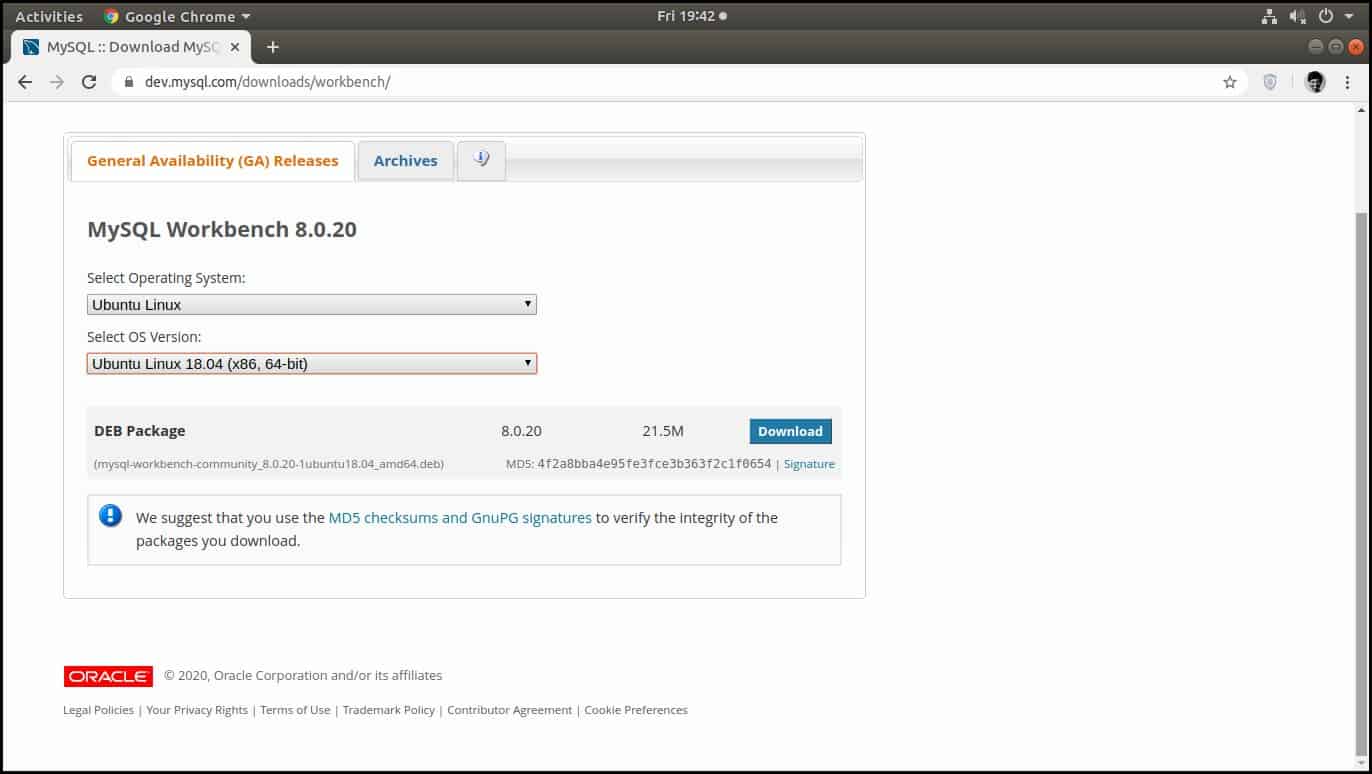
- To download MySQL Workbench on your Ubuntu operating system, Go to this link https://dev.mysql.com/downloads/workbench/
- Select the Operating system as Ubuntu Linux and the Os version as per your Operating system architecture and then click on the Download Link to proceed further, as shown in the figure below.
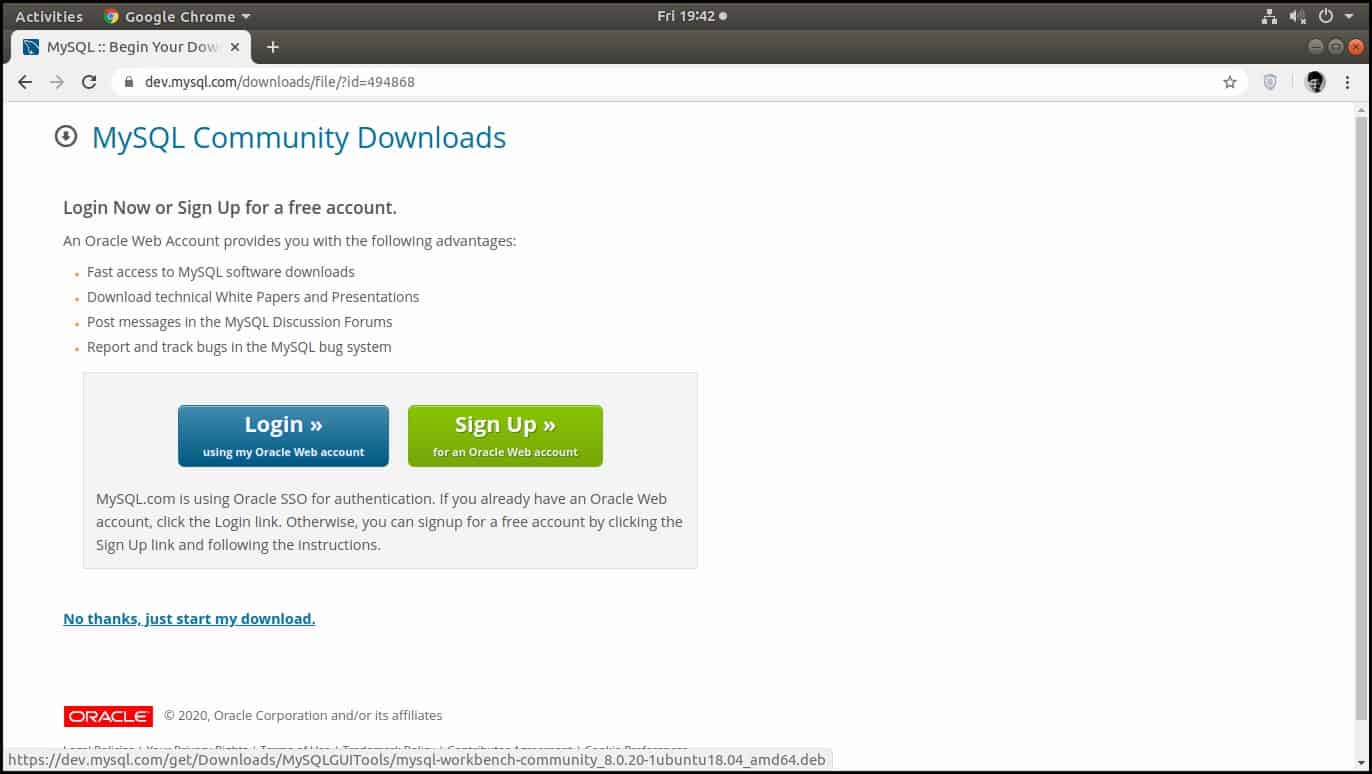
- As soon as you click on the download link, a new page will open, and It will ask you to login or sign up on Oracle web account But If you are only concerned about downloading the MySQL Workbench then scroll down a little bit and click on the link “No thanks, just start my download“ as shown in the figure below.
Step #2
- After you have successfully downloaded the file, Now the next step is that you have to install it in your system.
- Go to the location where you have downloaded the file and then open it with software install and you will see an interface as the figure shown below in which you have to click the install button.
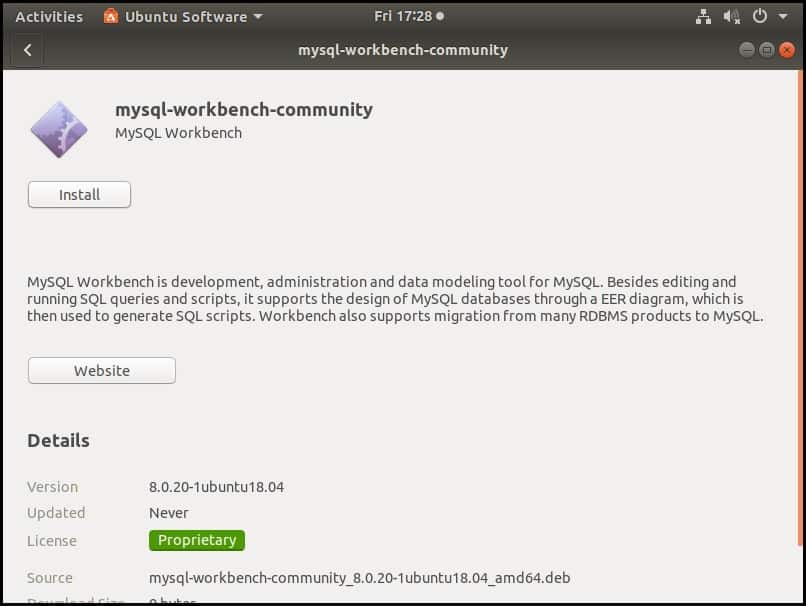
- As soon as you click on the install button, you will have to input your system password for authentication to proceed.
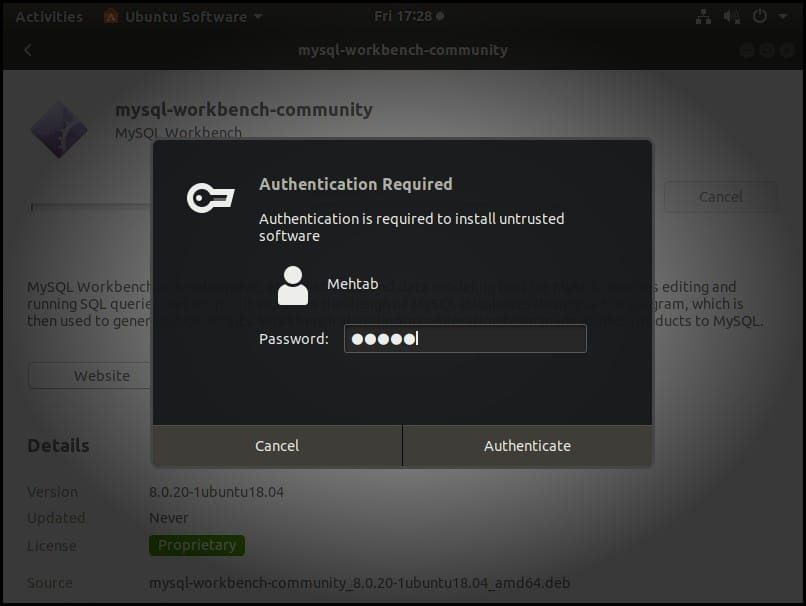
- Clicking on Authenticate will start the installation process and MySQL Workbench will be installed on your system.
Starting/Launching MySQL Workbench after installation on Ubuntu
- To start MySQL Workbench, go to Application Menu and then click on the MySQL Workbench icon to open it.
- On opening for the first time, you will see something like this user interface, as shown in the figure below.
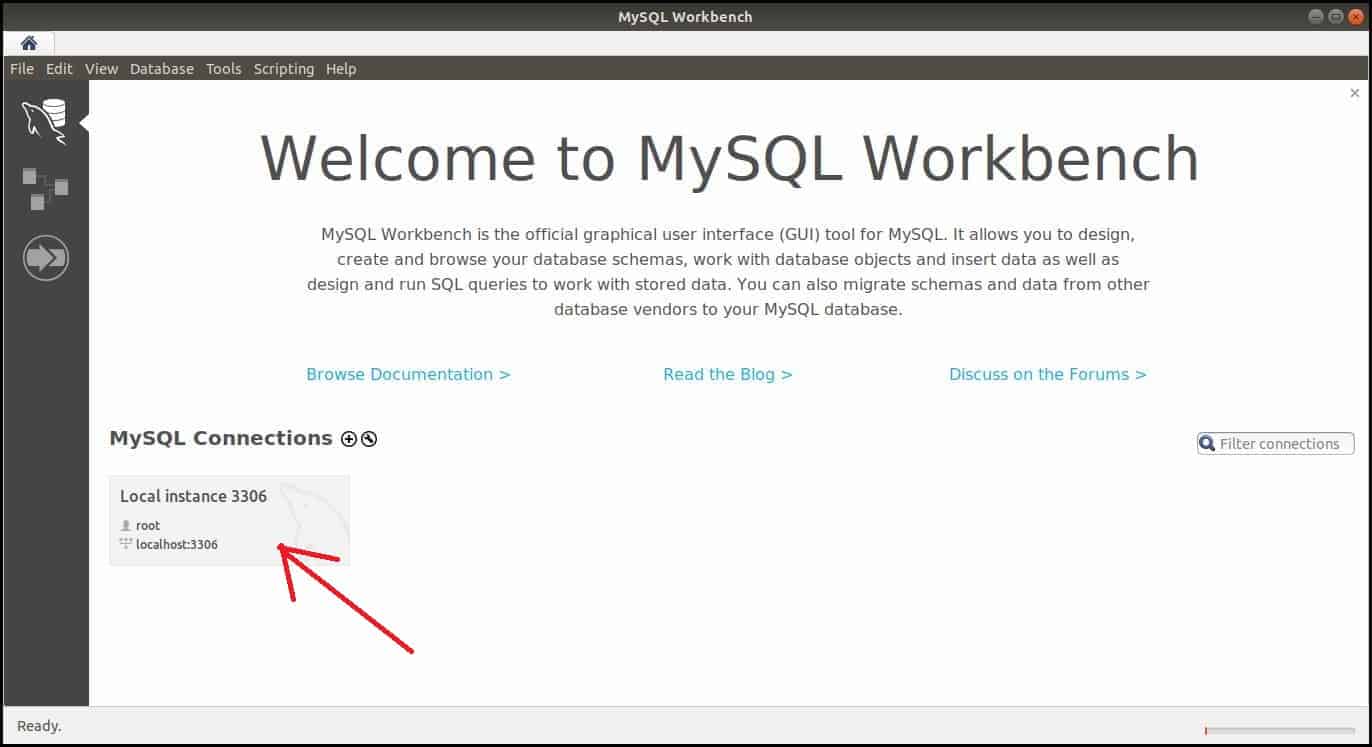
- To connect MySQL Workbench with MySQL Server, click on the location highlighted with the red arrow, as shown in the above figure.
- As soon as you click on it, a dialog box will appear, and it will ask you to fill the password.
- This is the same password that you have given during the installation process of MySQL Server, so fill in the correct password and click on the OK button.
Uninstalling MySQL Workbench on Ubuntu Operating System
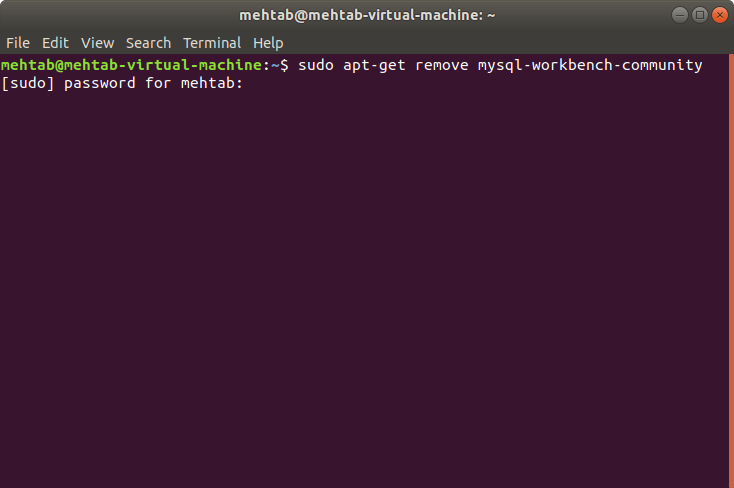
- To Uninstall MySQL Workbench on the Windows Operating system, Go to the Terminal and then type this command (sudo apt-get remove mysql-workbench-community) and hit Enter.
- As soon as you hit the Enter button, Then it will ask you for your system password, input your system password for the authentication process to proceed.
So, guys, l am wrapping up this guide, and in this guide, you learned how to install and uninstall MySQL workbench properly in Windows, Mac and Ubuntu operating systems in simple steps. Feel free to drop us a comment if you find something difficult during the Installation process.
Related Articles
How to Install MySQL Server on Windows 10
How to Connect MySQL Database in Java Using Eclipse
How to Connect MySQL Database in Java Using NetBeans
Registration form in java with database connectivity
Login form in java swing with source code
Java JButton click event