Hello friends, Welcome to my new tutorial, and in this tutorial, we will learn how to create AVD in android studio (Android Virtual Device).
In my previous tutorial, we got to know about What is Android and how to successfully install Android Studio in our System. If you haven’t seen my last post, then you can go ahead with the following link.
Learn Android Programming Step by Step
So without any further delay, let’s jump in to the point and learn How to crate AVD in Android studio.
Contents
How To Create AVD in Android Studio
What is AVD (Android Virtual Device) ?
- Android virtual device (AVD) also known as the Emulator, is a virtual mobile device which is used to run, test, and debug our android applications on the system without actually using the physical device.
- Since in Android Studio we create Android Application and to test and debug our apps we need a mobile device but connecting an actual physical device is not that simple in Android studio, and hence Android Studio provides us to create and use Android virtual device which lets us run, test and debug our application.
So this was the brief information about the Android Virtual device and now let’s know the steps required to create and set up the Android Emulator.
Prerequisite
- Before moving ahead and creating our Android Virtual Device, we need to make sure that all the installation packages are installed successfully.
- For this purpose, Go to Tools Menu and select the SDK manager.
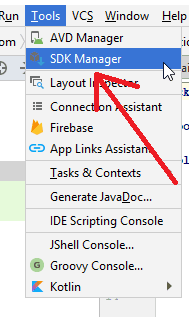
- Once you clicked on the SDK manager now select the tab SDK tools.
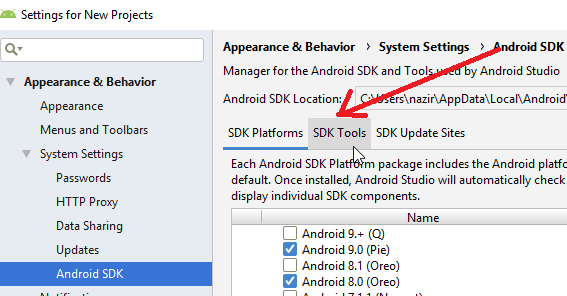
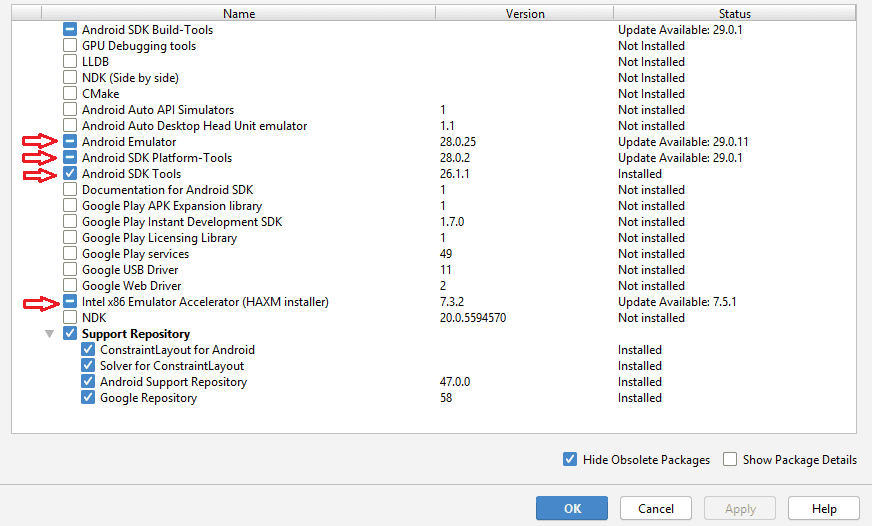
- After selecting the SDK Tools tab, make sure that,
- Android Emulator is selected and installed.
- Android SDK Platform-Tools is selected and installed.
- Android SDK Tools is selected and installed.
- Intel x86 Emulator Accelerator (HAXM Installer) is selected and installed.
Note – You must also assure that you have enabled the hardware virtualization in your PC’s BIOS and if you don’t know how to do it then you can follow this guide Simple Ways to Enable Hardware Virtualization .
- After performing all this, we can simply move on to the steps that are required to create an Android Virtual Device.
Steps to Create AVD in Android Studio
Step #1
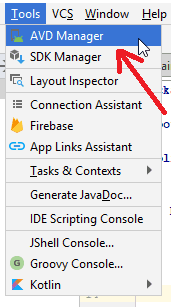
- Go to Tools Menu and select AVD manager.
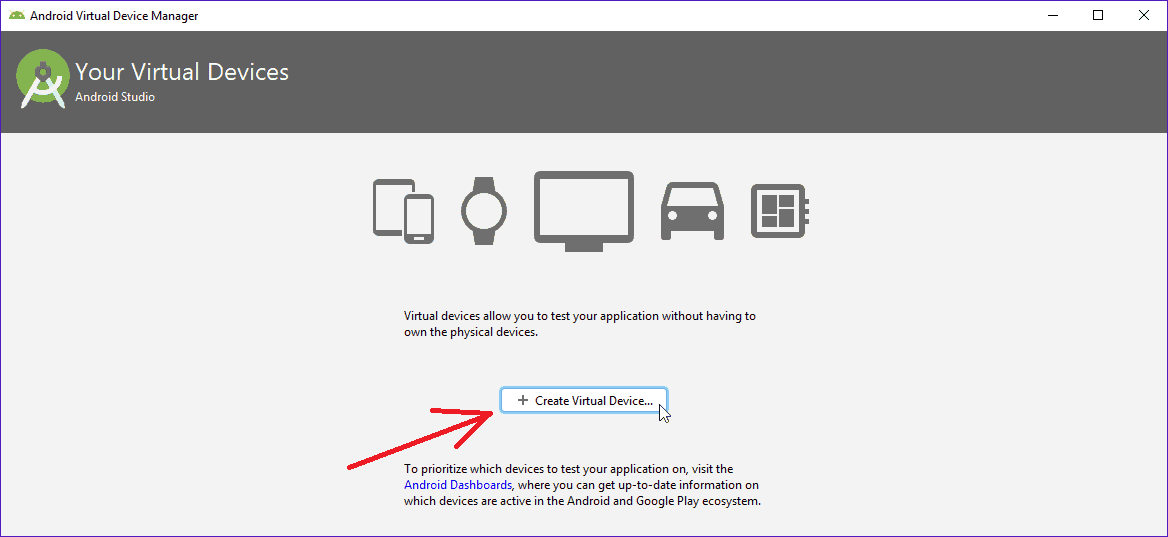
Step #2
- Once you selected the AVD manager, a new window will be opened, and you need to click on the button Create Virtual Device from that window as illustrated in the following image.
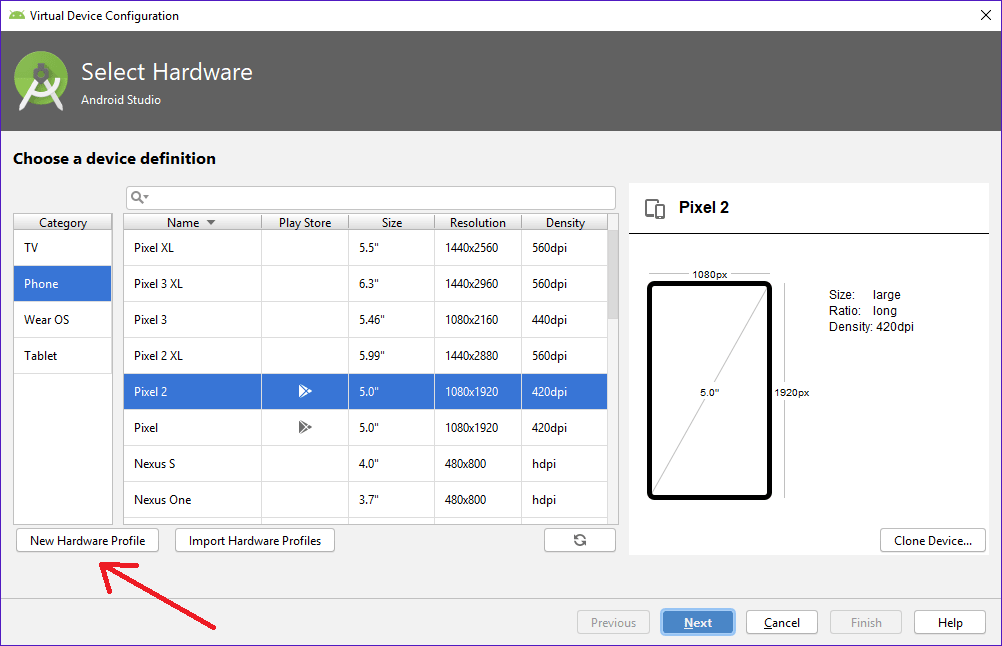
Step #3
- As soon as we click on the Create Virtual Device button, a new window will open, and it will ask us to choose the device definition from the variety of options.
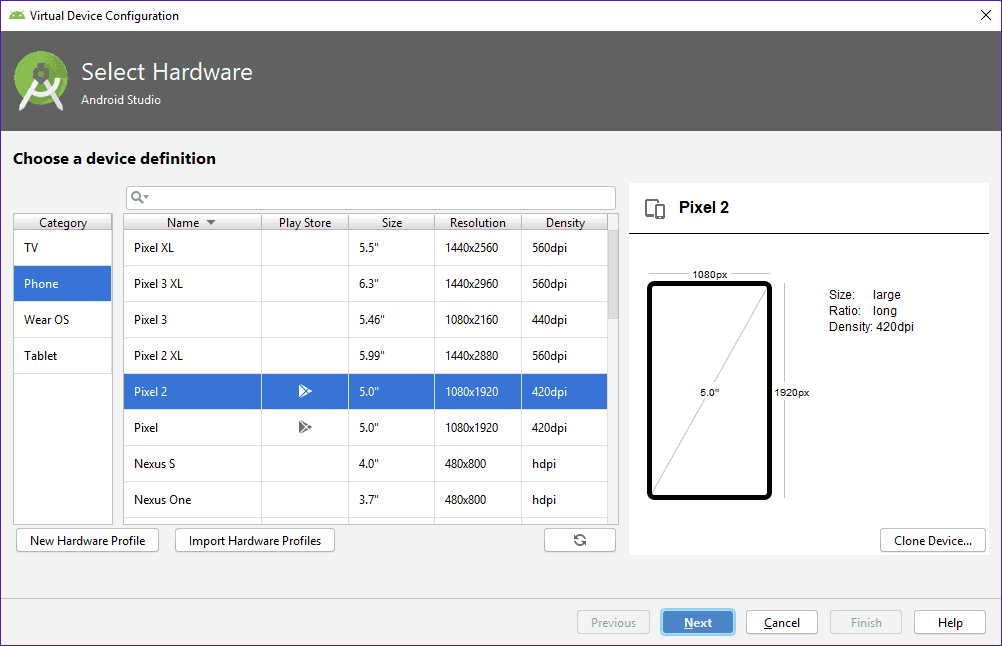
- Since Android Operating System is used in several devices like Phone, Tablet, TV, Watches etc hence we Can also create Android Virtual device for them separately.
- But For now, we need to select the category as Phone and then we have to choose the name, size of the screen, resolution of the screen and dpi (dots per inch ) as per our requirements for the Emulator.
- We can also create our own customized android virtual device as per our need by just clicking on the New Hardware Profile Button.
- Once you selected or created your own customized Hardware, just hit the Next button to proceed further.
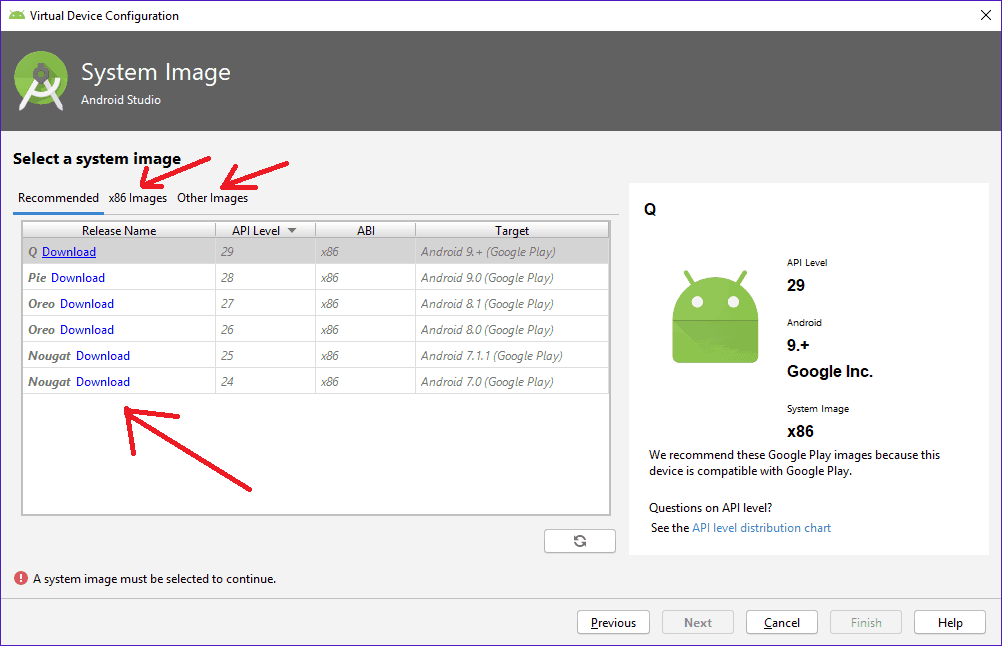
Step #4
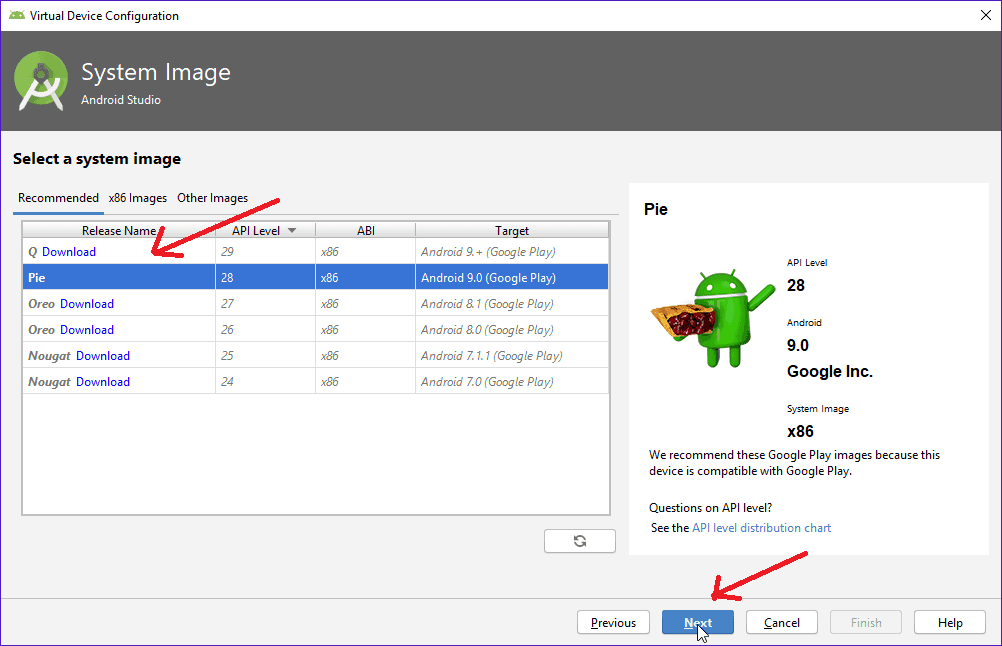
- After we click on the Next button, a new window will open, and it will ask us to select a system image to download.
- As per our need, we can select the API level and then hit the download button to download the system image.
- After you click on the download button, it will start downloading the requested component.
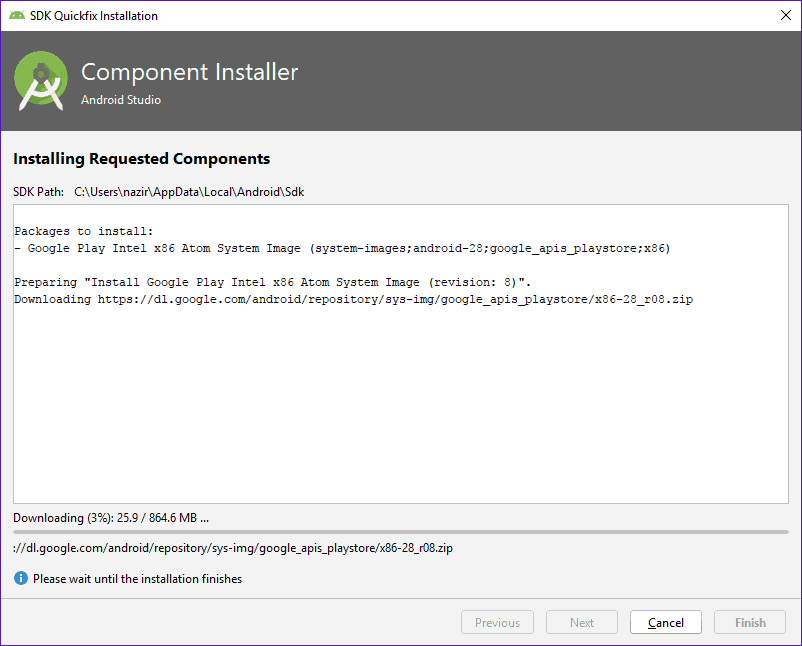
- After it completes downloading the components, click on the Finish button, and then select the image that you have just downloaded and click on the Next button.
Step #5
- After we click on the Next button, there will be options for us to configure the virtual device.
- For better performance of the virtual device, we can also make some changes within the Advanced Settings.

- After configuring the virtual device, click on the Finish button.
Step #6
- After we click on the Finish Button Android virtual device manager window will open, and now we can run our device by clicking on the play button.

- Now, let’s run our virtual device. For the first time, it may take some time to load the Emulator completely.
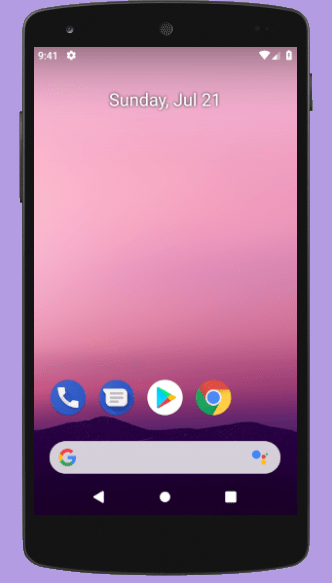
- So finally, we have successfully created our Android virtual Device.
Conclusion
Finally, we have come up with the conclusion that creating an Android Virtual Device in Android Studio is very easy if we follow the right steps otherwise sometimes it may become really tough if we are not aware with the steps.
So guys, I am wrapping up this tutorial How to Create AVD in Android Studio and feel free to leave us a comment if you find out any hassle while creating AVD in android studio.